Theme Customization
Using the WordPress Customizer, you can edit your theme options and preview the changes before publishing them to your live site.
Once you’ve activated a theme, you’ll see several default WordPress settings in the customizer. The available settings will vary depending upon which theme is activated.
To get started, go to Appearance > Customize to access the customizer. Once the customizer is open, you’ll see a menu on the left and a preview of your site content on the right:
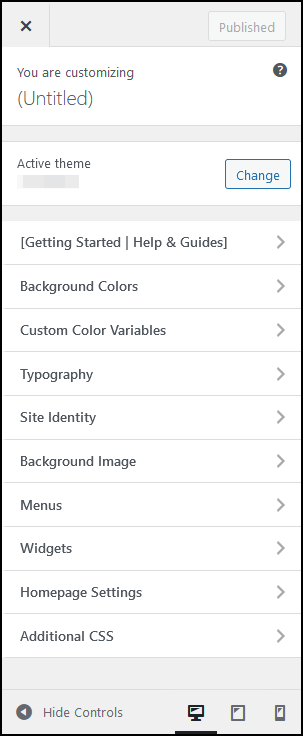
The customizer menu on the left side shows various options that are available for editing in your theme. You can choose from options such as colors, background images, menus, and more. The exact options available depend upon which theme you’ve activated.
On the right side, you’ll see a live, interactive preview so you can test each option in your theme. All changes will instantly appear as you modify customizer options.
To see the settings available within each option, click the title to open the expanded view. Remember, the available settings will be different for each theme.
- To see the interactive preview in full-screen mode, click the Collapse triangle at the bottom of the menu on the left side.
- When you are finished making all your changes, click Save & Publish. If you decide you do not want to save the changes you’ve made, click the X to close the editor and dismiss your changes.
Let’s go over some of the common options available in the customizer.
Getting Started | Help & Guides
This section provides some basic steps for getting started. It is recommended that you follow these steps for a better start. Also, don’t forget to check the buttons below the instructions for more information and to make the most out of your new theme.
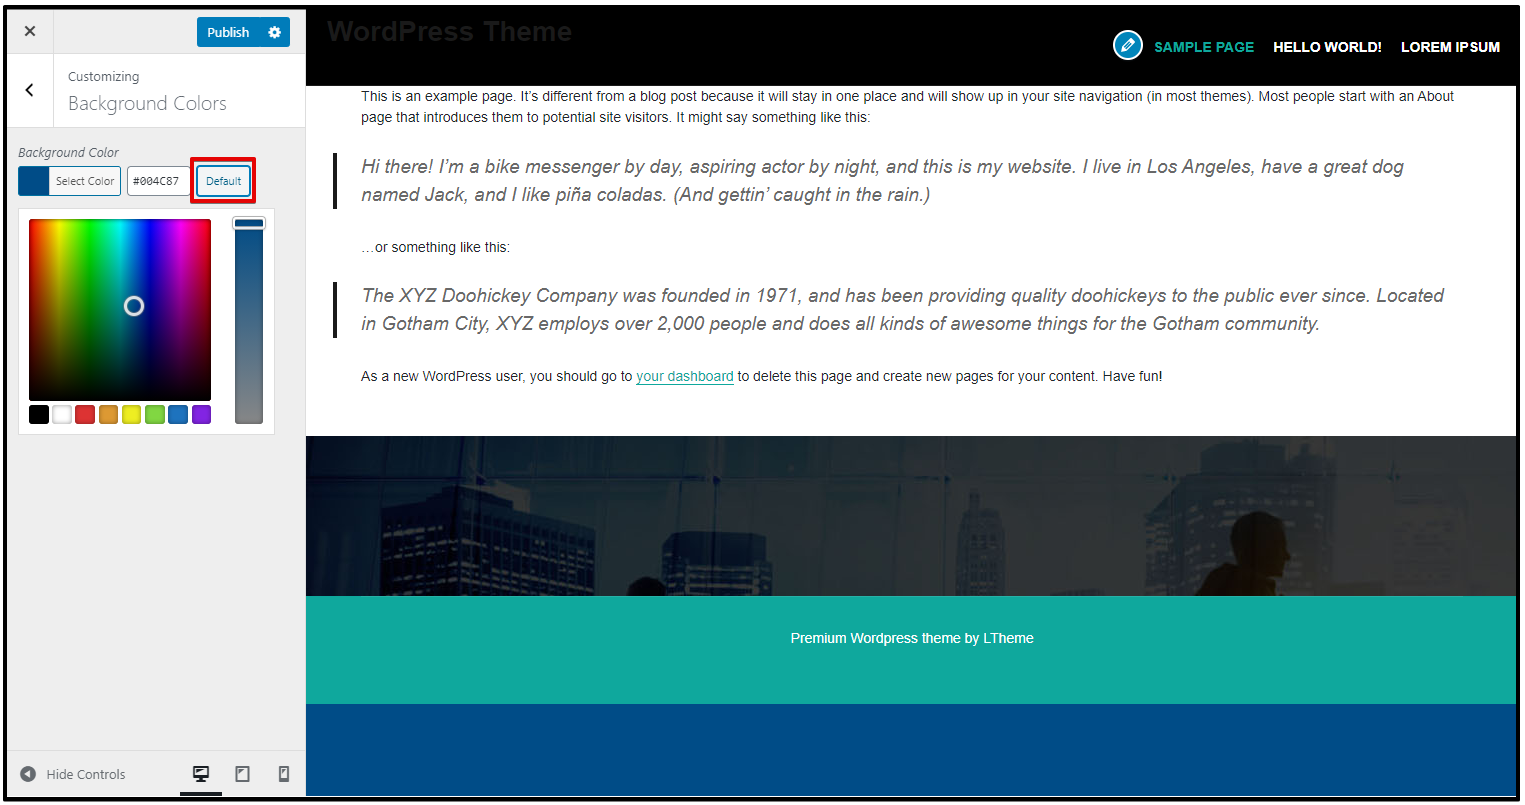
Background Colors
You can change or update your theme background colors right from WordPress Customizer. This option will vary depending on which theme is activated on your website. Just pick the color you want. Use the Default button in case you’d like to revert to the default colors.
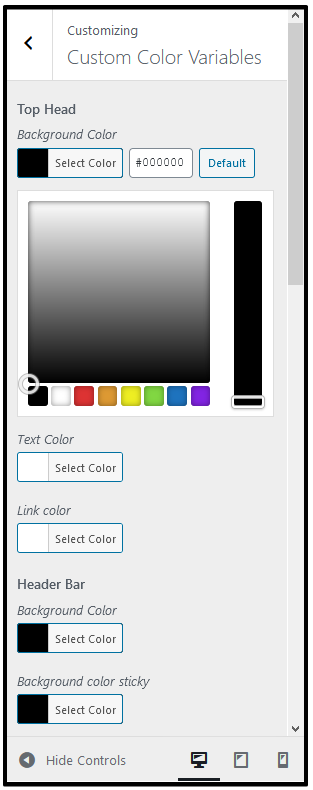
Custom Color Variables
With the Custom Color Variables settings built right into WordPress Customizer, you can now change the default colors used across the entire theme globally and/or in one place. Set the color for the Top Head, Header Bar, Menu Custom, Sub Menu Custom, Footer, and Copyright. Define your project/brand colors in one place and keep everything nice & organized.
Click the Default button next to the color code inside each option if you want to reset it back to the theme’s original color.
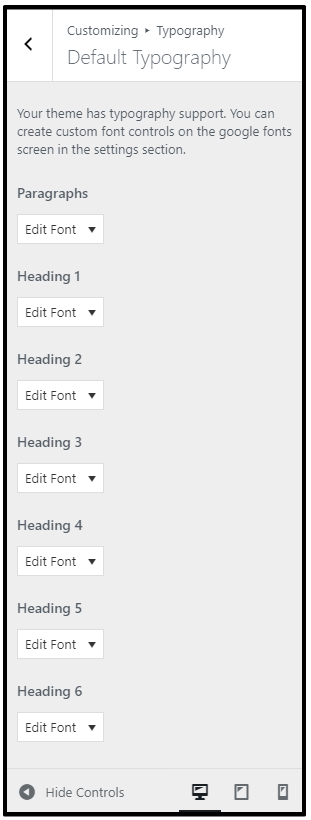
Typography
Typography plays an important role in design. Beautiful fonts create a better user experience, increase engagement, and boost the time users spend on your site.
Typography allows you to tweak typeface to suit your needs. You can use Google Fonts in our theme. You can change the typography on your website without applying any code. It also allows you to control the typography on your WordPress site by adding a Typography tab in the theme customizer. Using the Typography tab, you can change fonts while viewing a live preview of your changes. You can choose font sizes, colors, padding, border, and more.
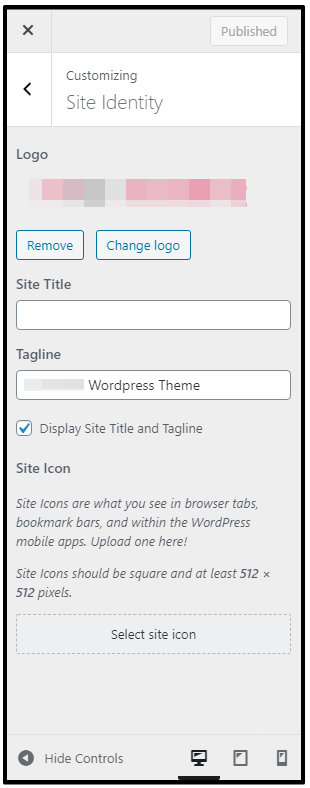
Site Identity & Upload Logo
You can set your site title, tagline, upload your site icon (favicon), and/or your logo here. If you have activated a theme that doesn’t include the Header Image setting (see below), you can also choose whether you’d like to display an Image logo or Dynamic text for your site title.
Please watch this video for more details.
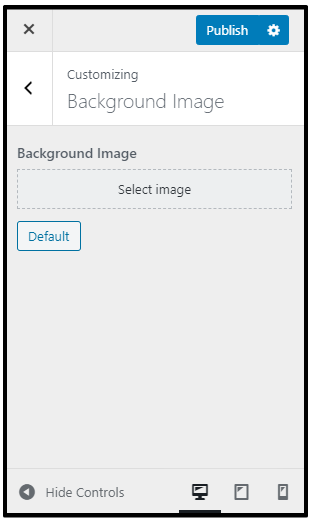
Background Image
Most of our themes come with custom background support through the WordPress Customizer which allows you to easily set a background image for your WordPress website.
To add or change a background image, click on the Background Image option. The panel will now slide in and show you the options to upload or select a background image for your website. Select one and hit Publish to apply your image.
Click Default to reset it to the original settings in case you want to undo all your changes.
Menu Location
You can create and edit menus, as well as manage their location, within the Customizer. The available menu locations will depend upon which theme is activated on your site.
Click Menu Locations to see the available locations in your theme.
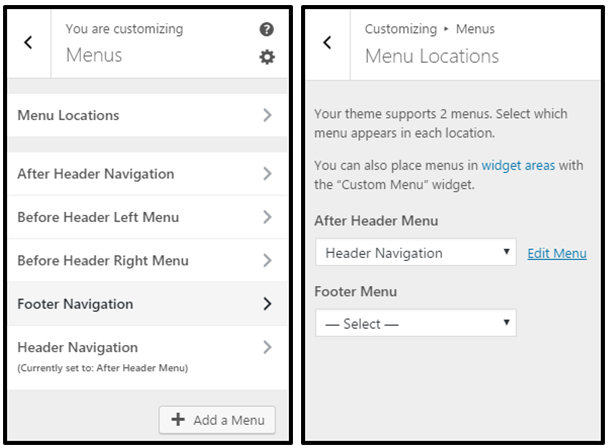
Use the drop-downs to select a navigation menu to display in each available location. Or, if you prefer, you can set both locations to — Select —(in other words, turn them off ) and use a Custom Menu widget in a widget area instead.
Click Add a Menu to create a new menu. Alternatively, you can click on the name of an existing menu to edit it.
- Give the new menu a name and click Create Menu.
- Click Add Items to begin adding links to the navigation menu.
- Click the titles to open the expanded view of the options or use the search field to locate items for the menu.
When you’re finished adding all the menu items, click Save & Publish to preserve your settings.
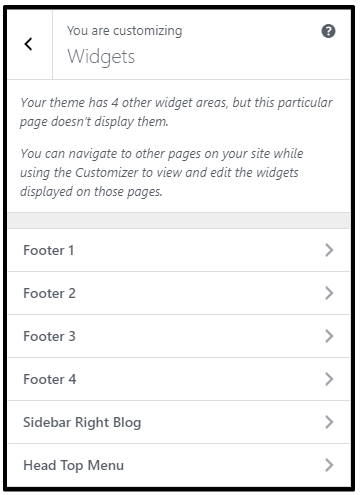
Widget Manager
Some themes offer unique widget areas where you can add widgets to display important information. The exact widget areas available will depend upon which theme is currently active on your site.
Click on any available widget area to open a new panel where you can add and configure widgets.
In the open panel, click Add a Widget to display the available widgets that you can add to this widget area.
You’ll see a list of all the available widgets you can add to the available widget areas. You can directly click on any widget you’d like to add. Scroll down the list or use the Search widgets… box at the top to locate the one you’d like to use.
Note: You can click the Hide Controls button in the bottom left corner of the screen to temporarily hide the Customizer and preview your changes in full-screen mode.
After selecting a widget, you can configure it however you want, then click Save & Publish to preserve your changes.
You can also click Reorder to rearrange the widgets into the order you prefer or to select a new widget area to move the widget into.
Click Done when finished and then click Save & Publish to apply your changes.
Illustration of Customizing Widgets in WordPress
Home Page Settings
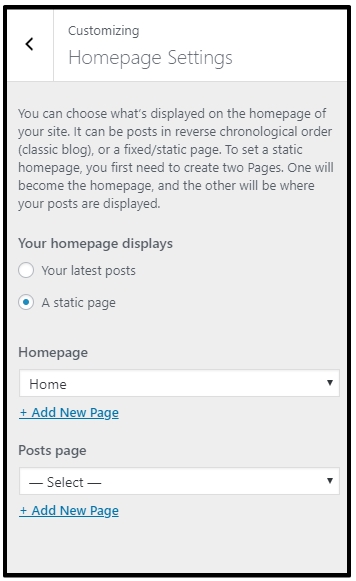
The default setting for the front page is Your latest posts. This setting allows you to display a blog-style front page. You can, however, select any page on your site to be displayed as the front page instead of your latest posts.
If you select A static page, you can select which existing page on your site will be displayed on your front page.
You can also select which page will display your blog posts. This page should be different from the one you’ve selected for the static front page and should not be set to use the Blog Page template.
Notice: If your theme uses the front page to display widgets, the widgets will be displayed regardless of which setting you choose here. If you prefer to display your latest posts or a static page on your front page, you’ll need to remove all widgets from all front page-related widget areas.
Illustration of Homepage Settings Customization
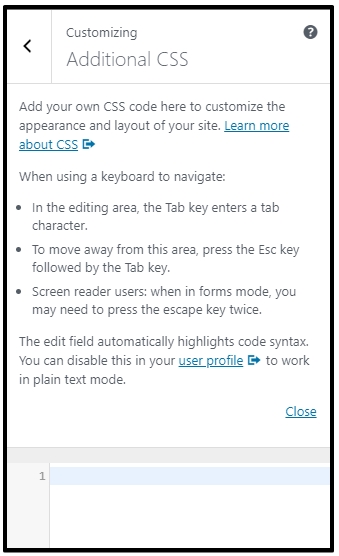
Additional CSS
Add your own CSS code here to customize the appearance and layout of your site. Learn more about CSS
When using a keyboard to navigate:
- In the editing area, the Tab key enters a tab character.
- To move away from this area, press the Esc key followed by the Tab key.
- Screen reader users: when in forms mode, you may need to press the escape key twice.
The edit field automatically highlights code syntax. You can disable this in your user profile (opens in a new window) to work in plain text mode.
Template Installation
Install Template Package
Before installing the Free Template Package, you must make sure that you have installed Joomla. Download the latest release of Joomla 4 at http://www.joomla.org/download.html, and install it on your localhost or hosting.
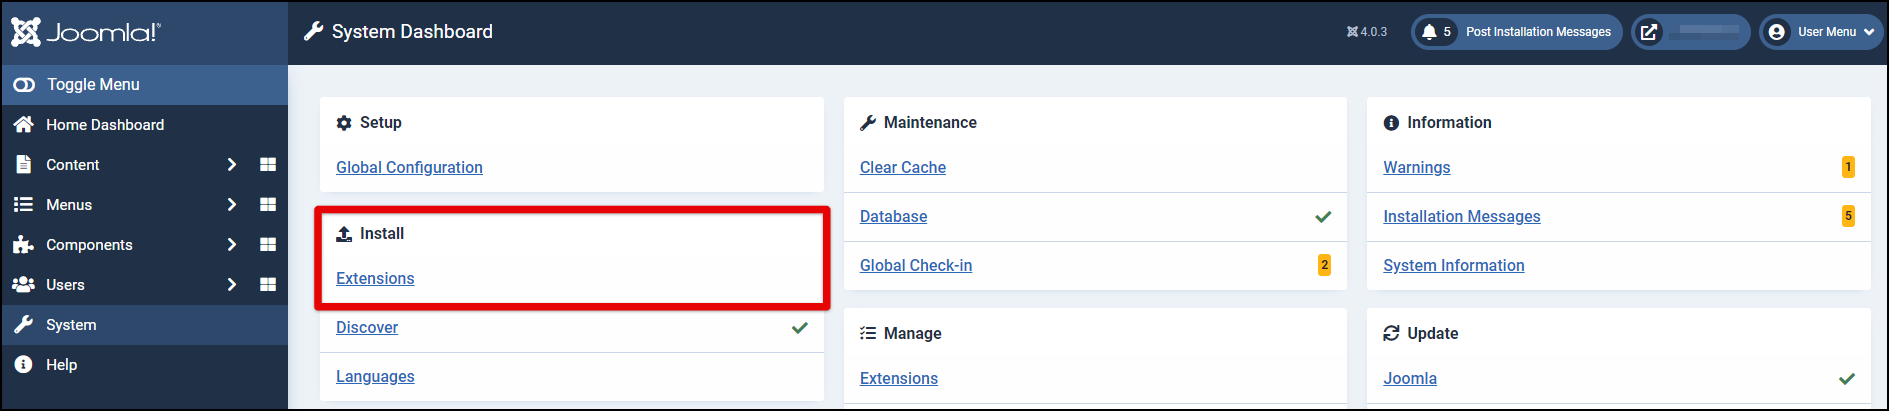
Template package use for a new website that you want to build content from zero without sample data, or using for your website with existing data. To install it, just download the Template Install-Package file and install it via Extension Manager (By go to Joomla! Admin panel > System > Install Extensions, browser file and click to upload). After finish, you can go to Template Manager, switch to default Joomla! template to new template.
To start to build your website, you can use standard Joomla! elements such as Articles, Modules, etc. Other extensions such as Page Builder, Slider, Portfolios, etc. you can see download links and documents via part Third-party Build-in Document. All extensions are FREE, you can download and install them without extra payment.
Install Quickstart Package and Active all Features (PRO)
If you want to access all features and get sample data and layout as on the live demo, consider getting the PRO version of the template. This package is only available in the PRO version, by access the PRO version, you just go to our Joomla! Template Listing, find your template name and go to the detail of the template, and order the PRO version.
With the PRO version, you have all access to template features, Quickstart download, and 12 months for dedicated support service!
Template Content & Styles
How to Display Main Menu
Open a new browser window and type in the URL, which will be similar to http://www.your-site-name-here.com/administrator or, if you have Joomla! installed on your local computer, http://localhost/your-folder-name-here/administrator. Here you will have to log in as an Administrator or Super Administrator.
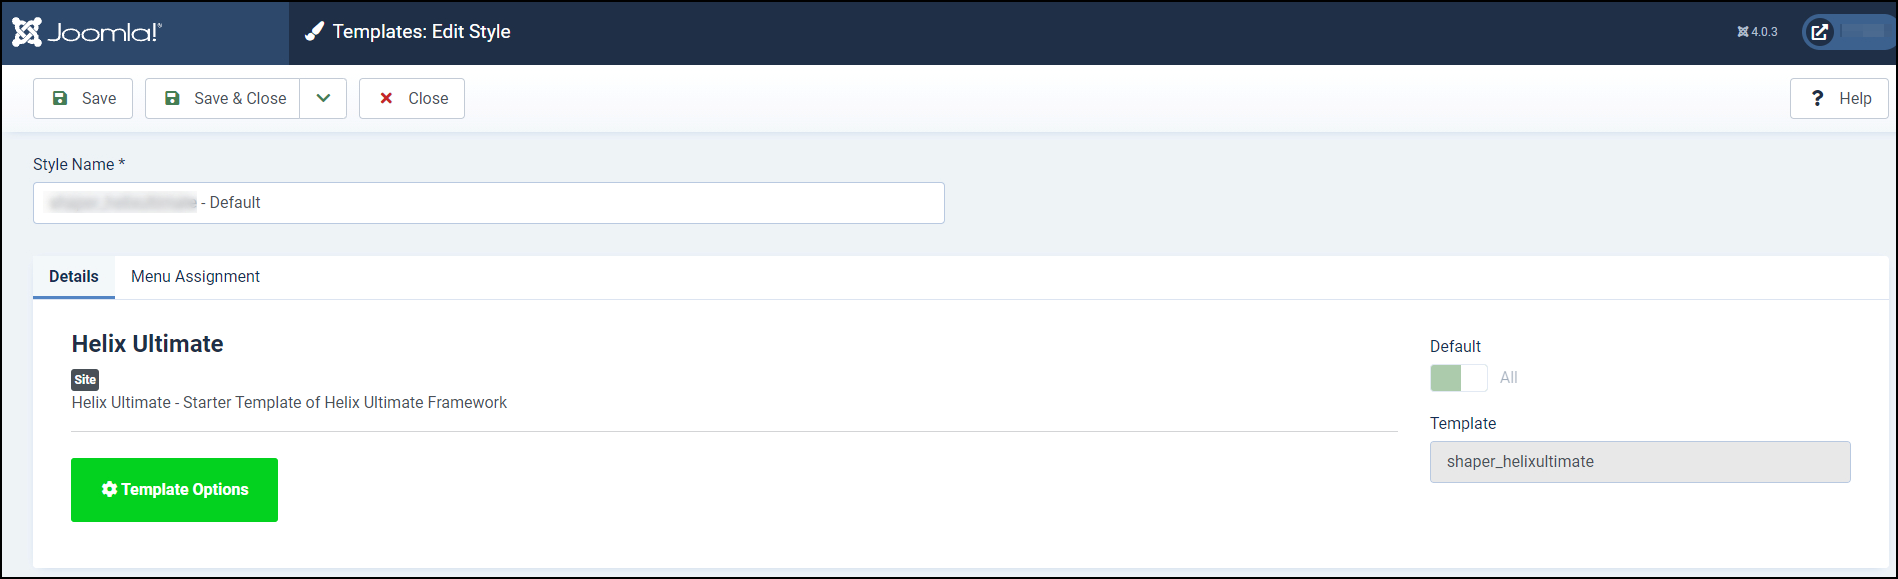
Go to “System” / “Site Templates Style” / “[template_name]-default”. This is where you edit template styles.
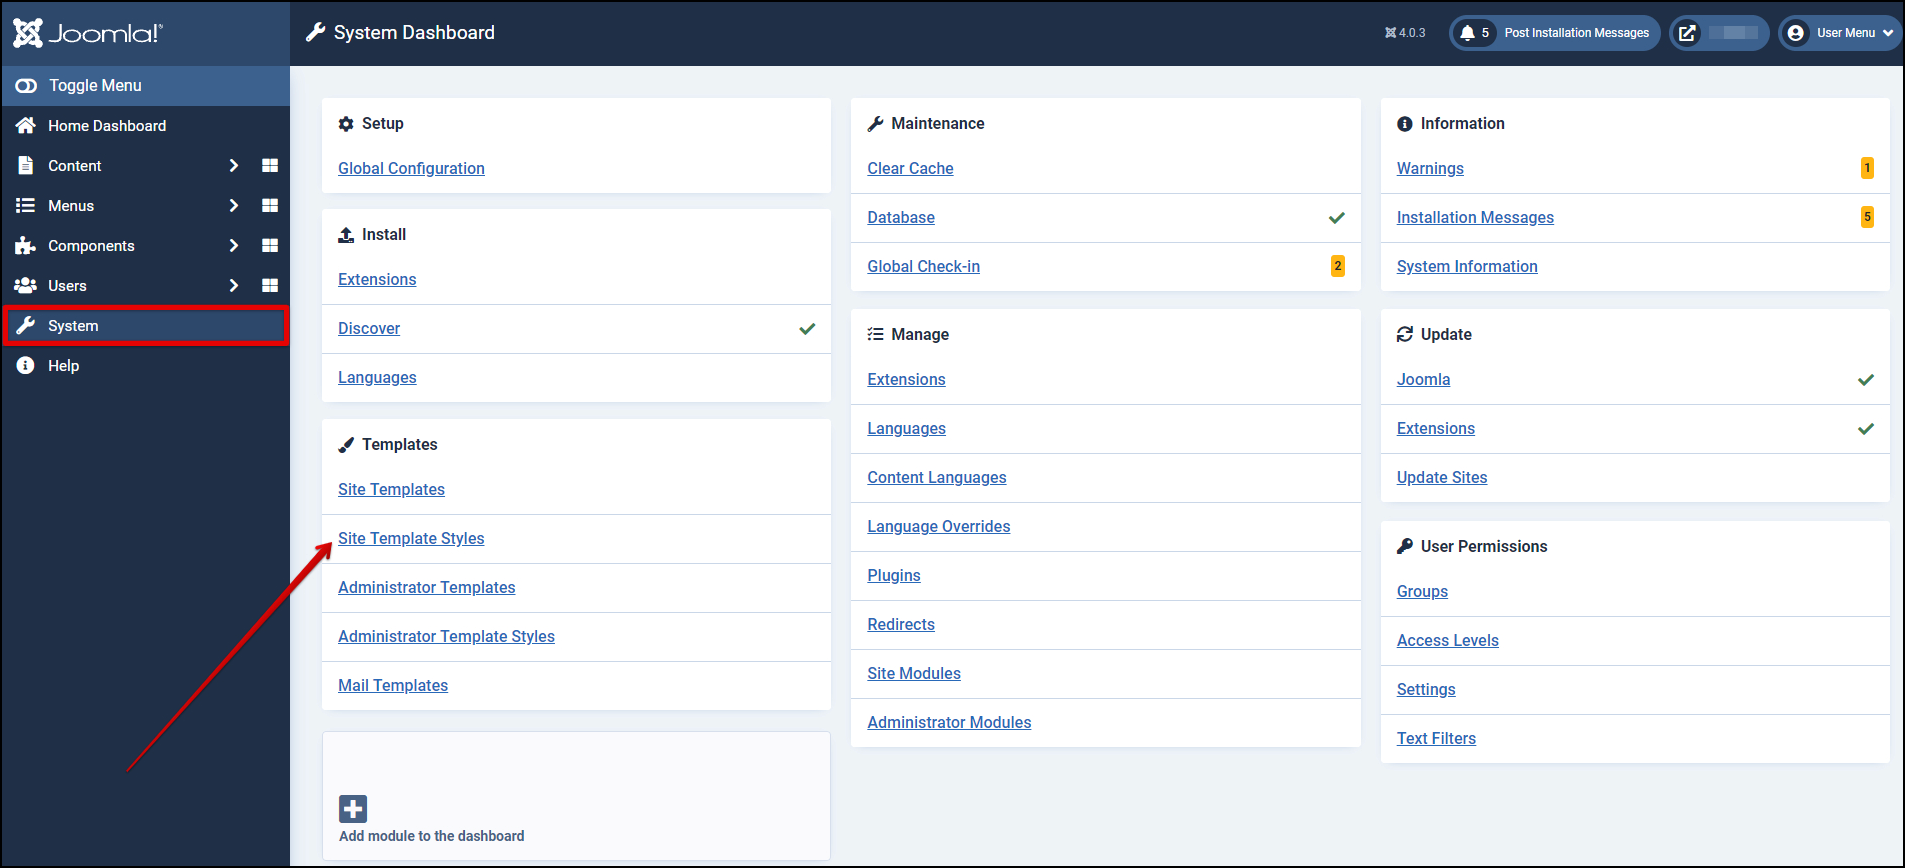
Please click the button “Template Options“.
Please click Menu > Menu Builder and choose “Main Menu” at Menu Type.
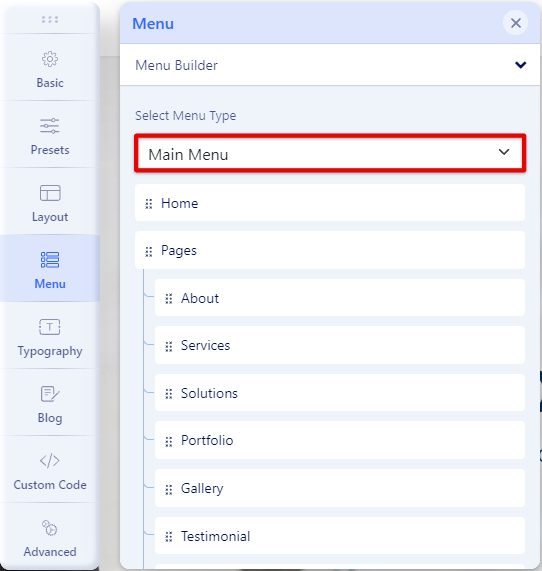
Click the Save toolbar button to save the Main Menu. To leave without saving click the Cancel toolbar button.
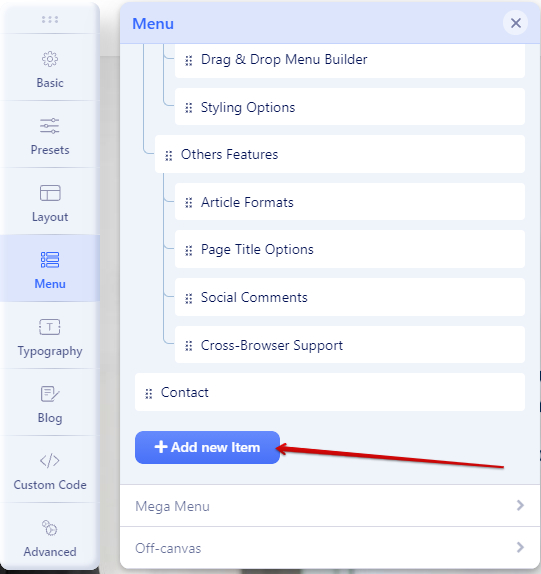
Add Menu Items to Your Menu
To Create a New Menu Item:
- Select Menu → Menu Builder → [name of the menu] → Add New Menu Item. For example, if a Menu is called “Main Menu”, select Menu → Menu Builder → Main Menu → Add New Menu Item.
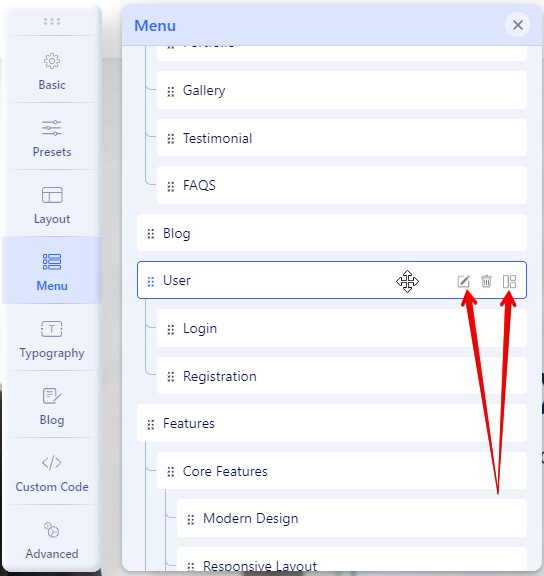
To Edit a Menu Item:
- Select Menu → Menu Builder → [name of the menu. For example, if a Menu is called “Main Menu“, select Menu → Menu Builder → Main Menu. Then either click the title of the menu item in the table list or select the menu item checkbox and click the “Edit” icon in the toolbar.
How to Add a New Menu
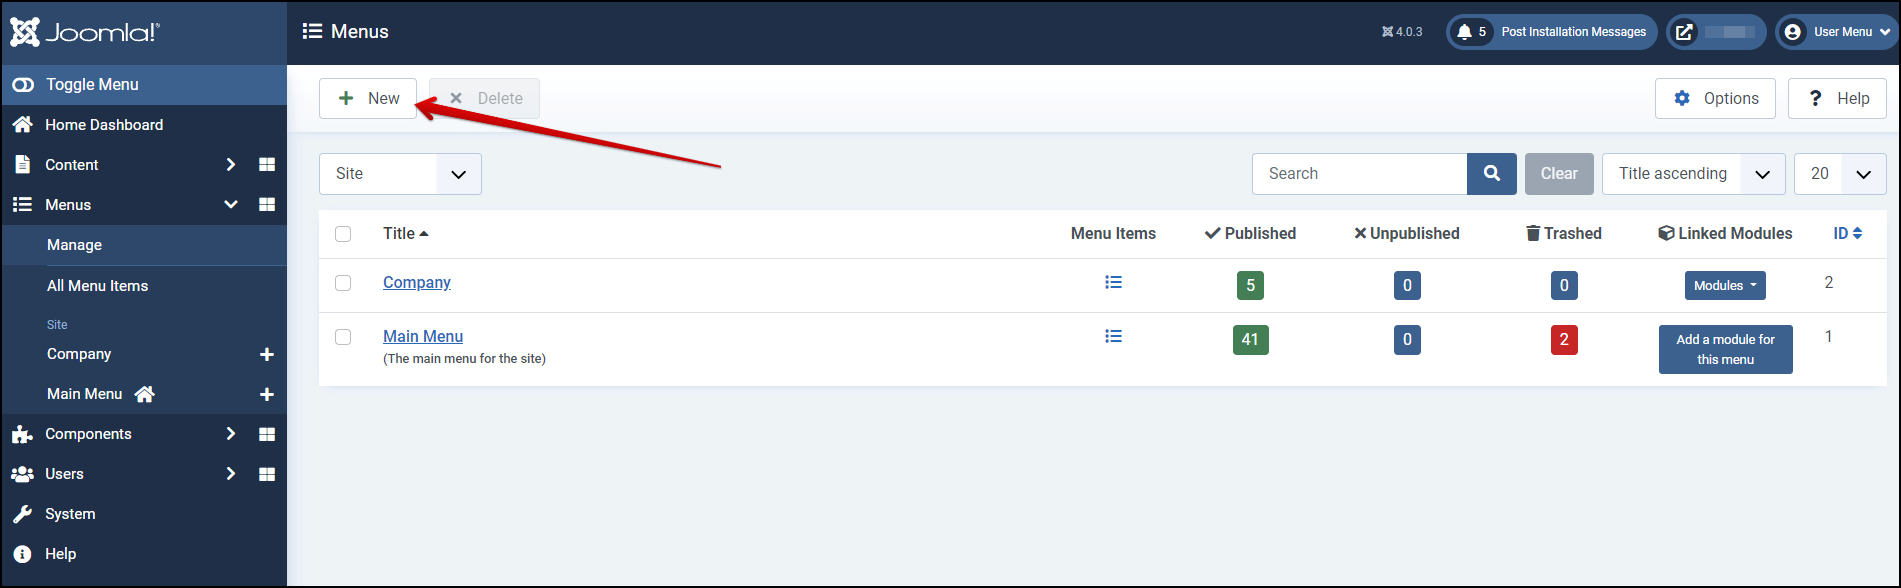
Within the site administration panel, select Menus from the menu bar in the upper left corner. From the drop-down list, choose “Manage” then choose “New”.
3. Fill in the “Title”, “Menu Type” and a “Description”:
- Title *: A proper title for the menu. This is used to identify the menu in the Menu Manager in the backend.
- Menu type *: This should be a unique identification name used by Joomla! to identify this menu. Spaces are not allowed but you may use the ‘-‘ character such as news-menu.
- Description: A description of the menu, useful for your own reference.
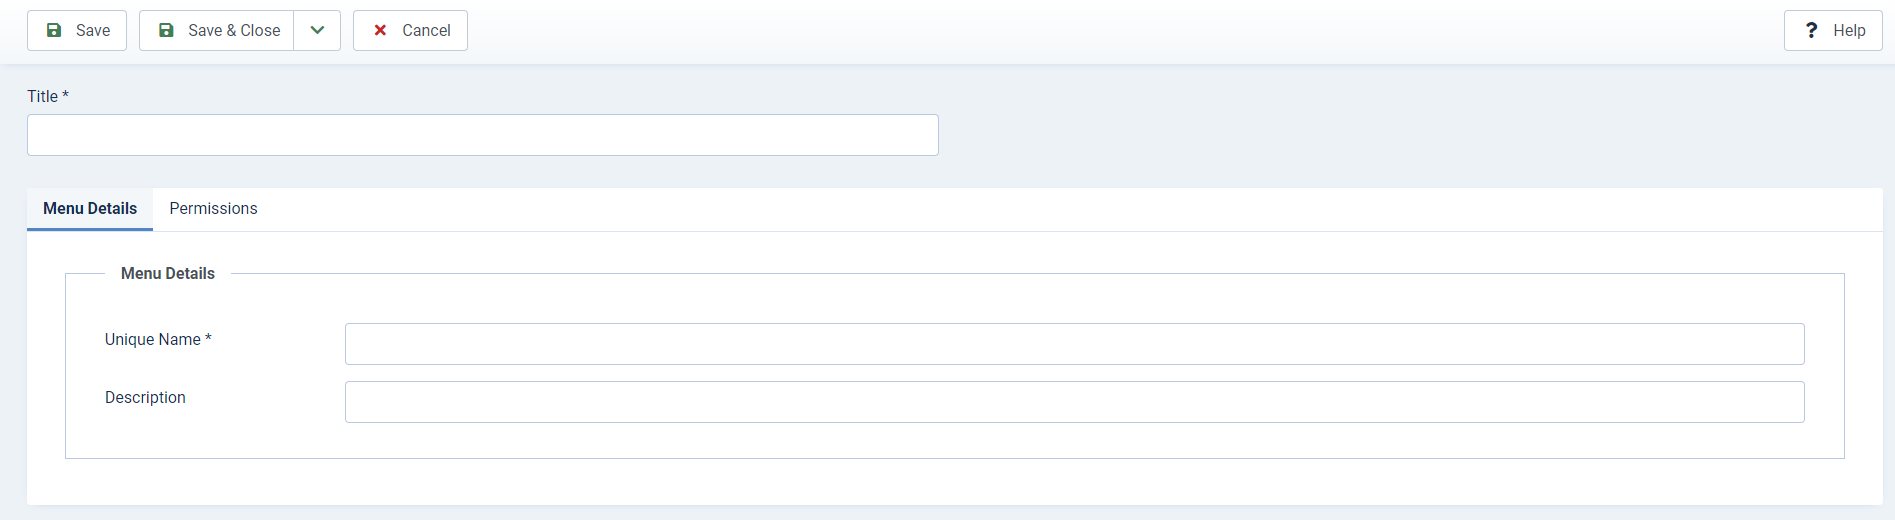
Click the Save or the Save & Close toolbar button to create the new menu. The Save & Close button will return you to the Menu Manager. To leave without saving click the Cancel toolbar button.
4. If you saved and closed, you will see your new menu in the list of Menus.
WPML Compatible
WPML makes it easy to build multilingual sites and run them. It’s powerful enough for corporate sites, yet simple for blogs.
You should activate the essential WPML components, which will allow you to fully translate your theme:
- WPML core plugin
- WPML String Translation add-on
To get them, go to your WPML account and click on Downloads.
Translating Pages, Posts, and Custom Posts
To translate pages, posts, custom posts, or any of the type of content coming from plugins on your site, follow these steps:
- Go to WPML → Translation Dashboard.
- Expand the sections with the content you want to translate and select your items.
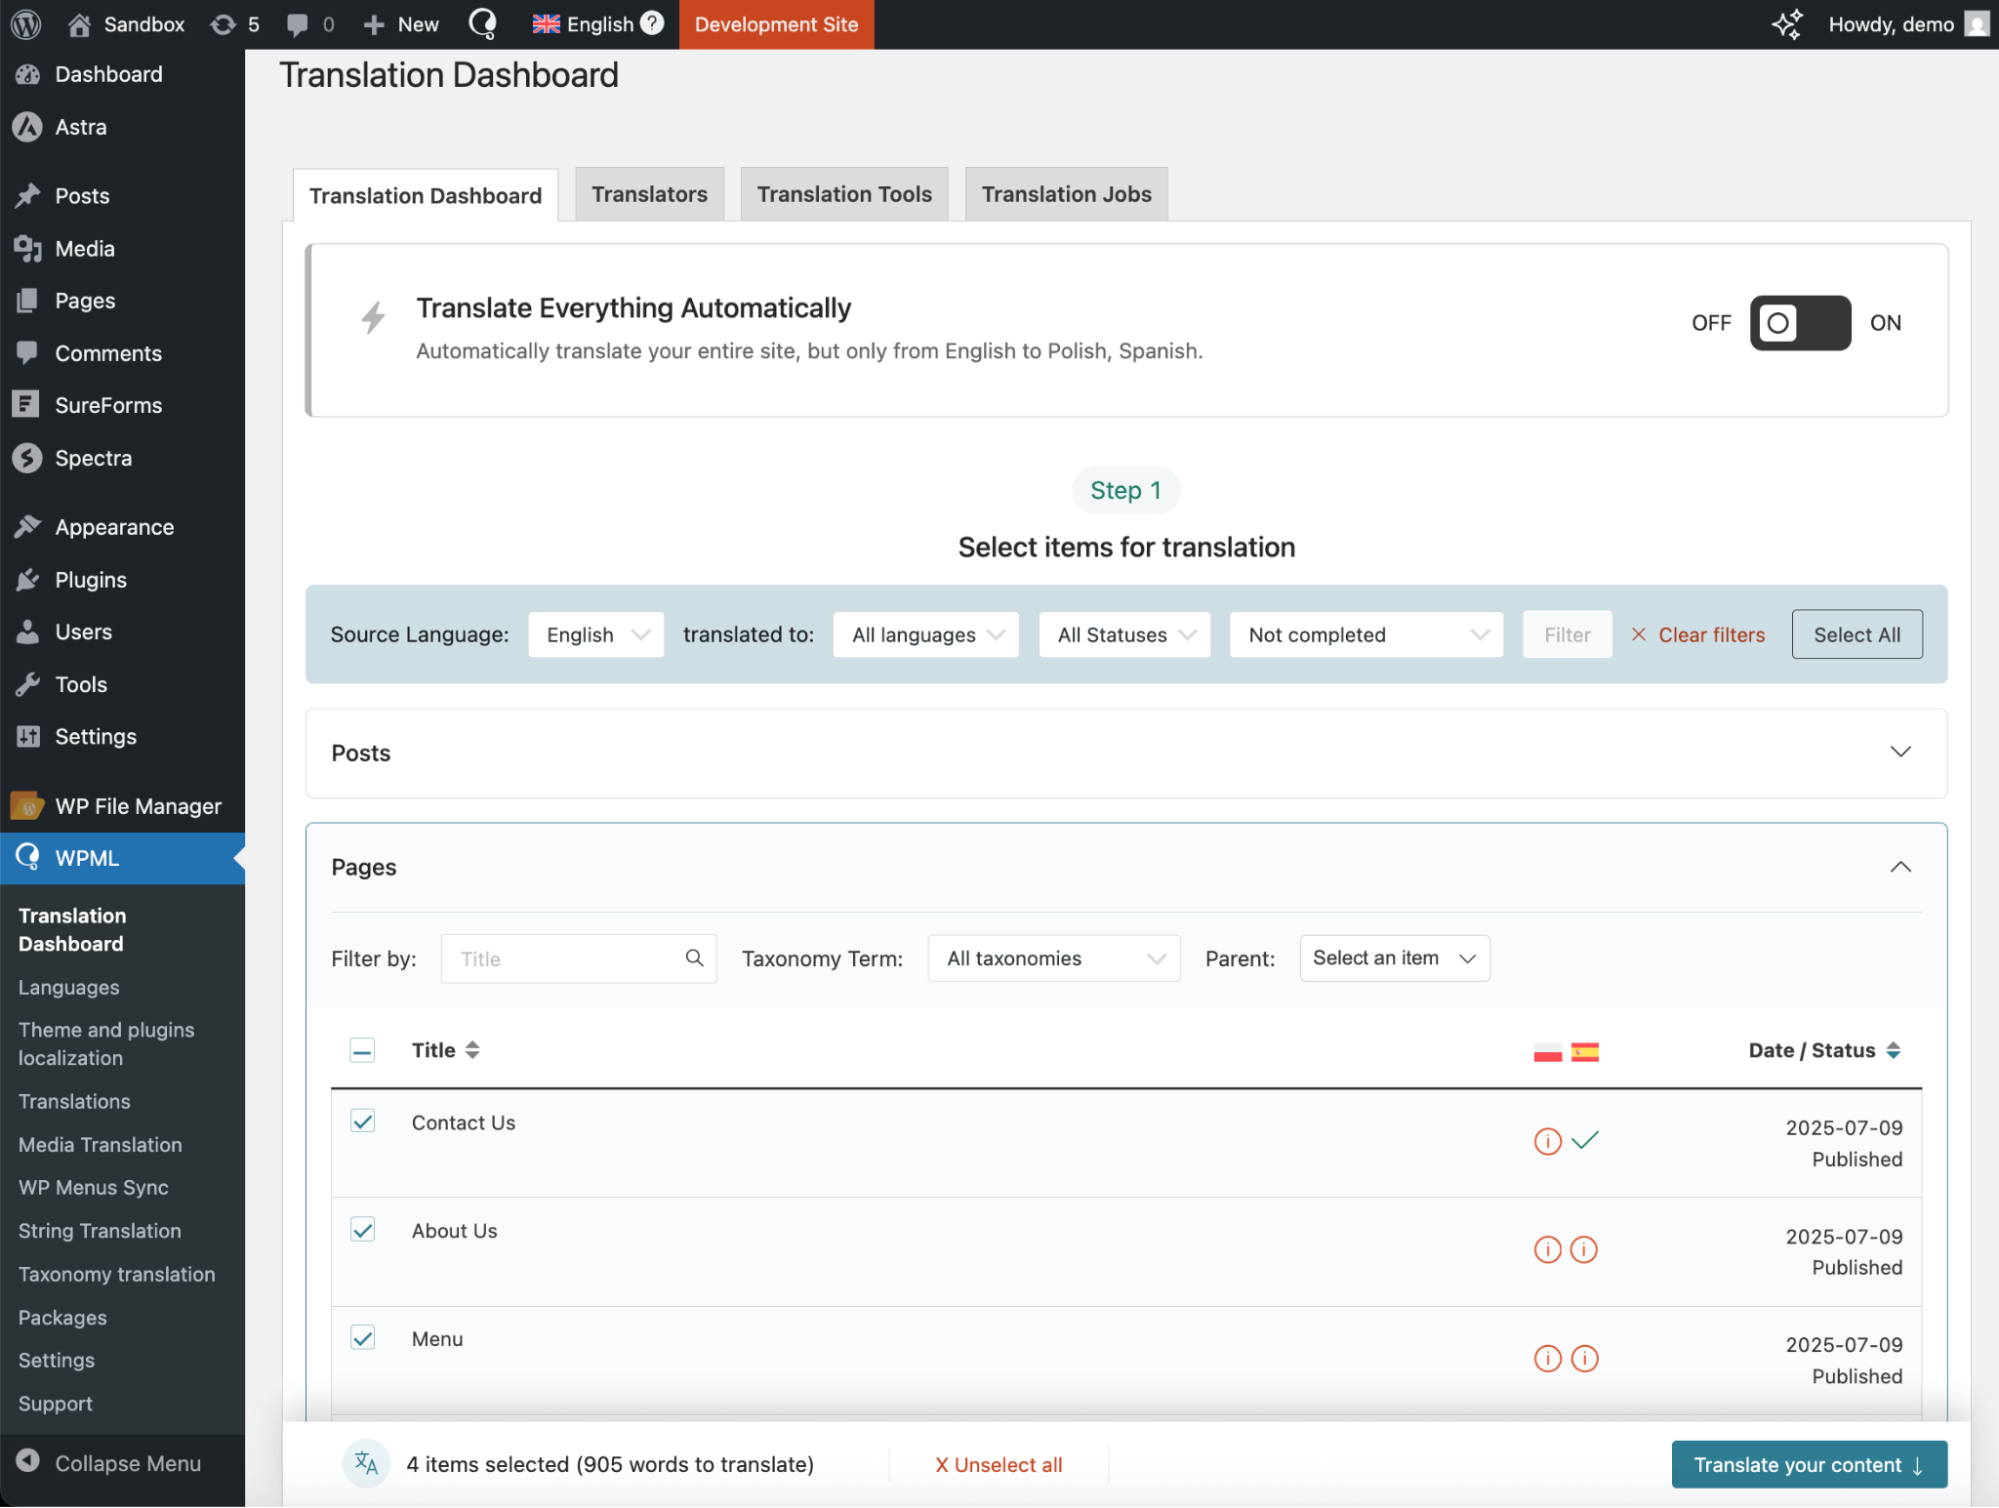
Once you select all your items, the next step is to choose your translation method.
To get the best results, we recommend using Private Translation Cloud (PTC) — WPML’s most accurate AI translator.
Using the context you provide, PTC creates translations that perfectly match your industry, audience, and content. It works like your own team of expert translators, with a deep understanding of your brand and niche.
PTC is WPML’s proprietary AI technology and comes with a translation quality guarantee: if you’re not satisfied with the results, WPML will fix the translations or issue you a refund for them.
Choose a translation method and click Translate.
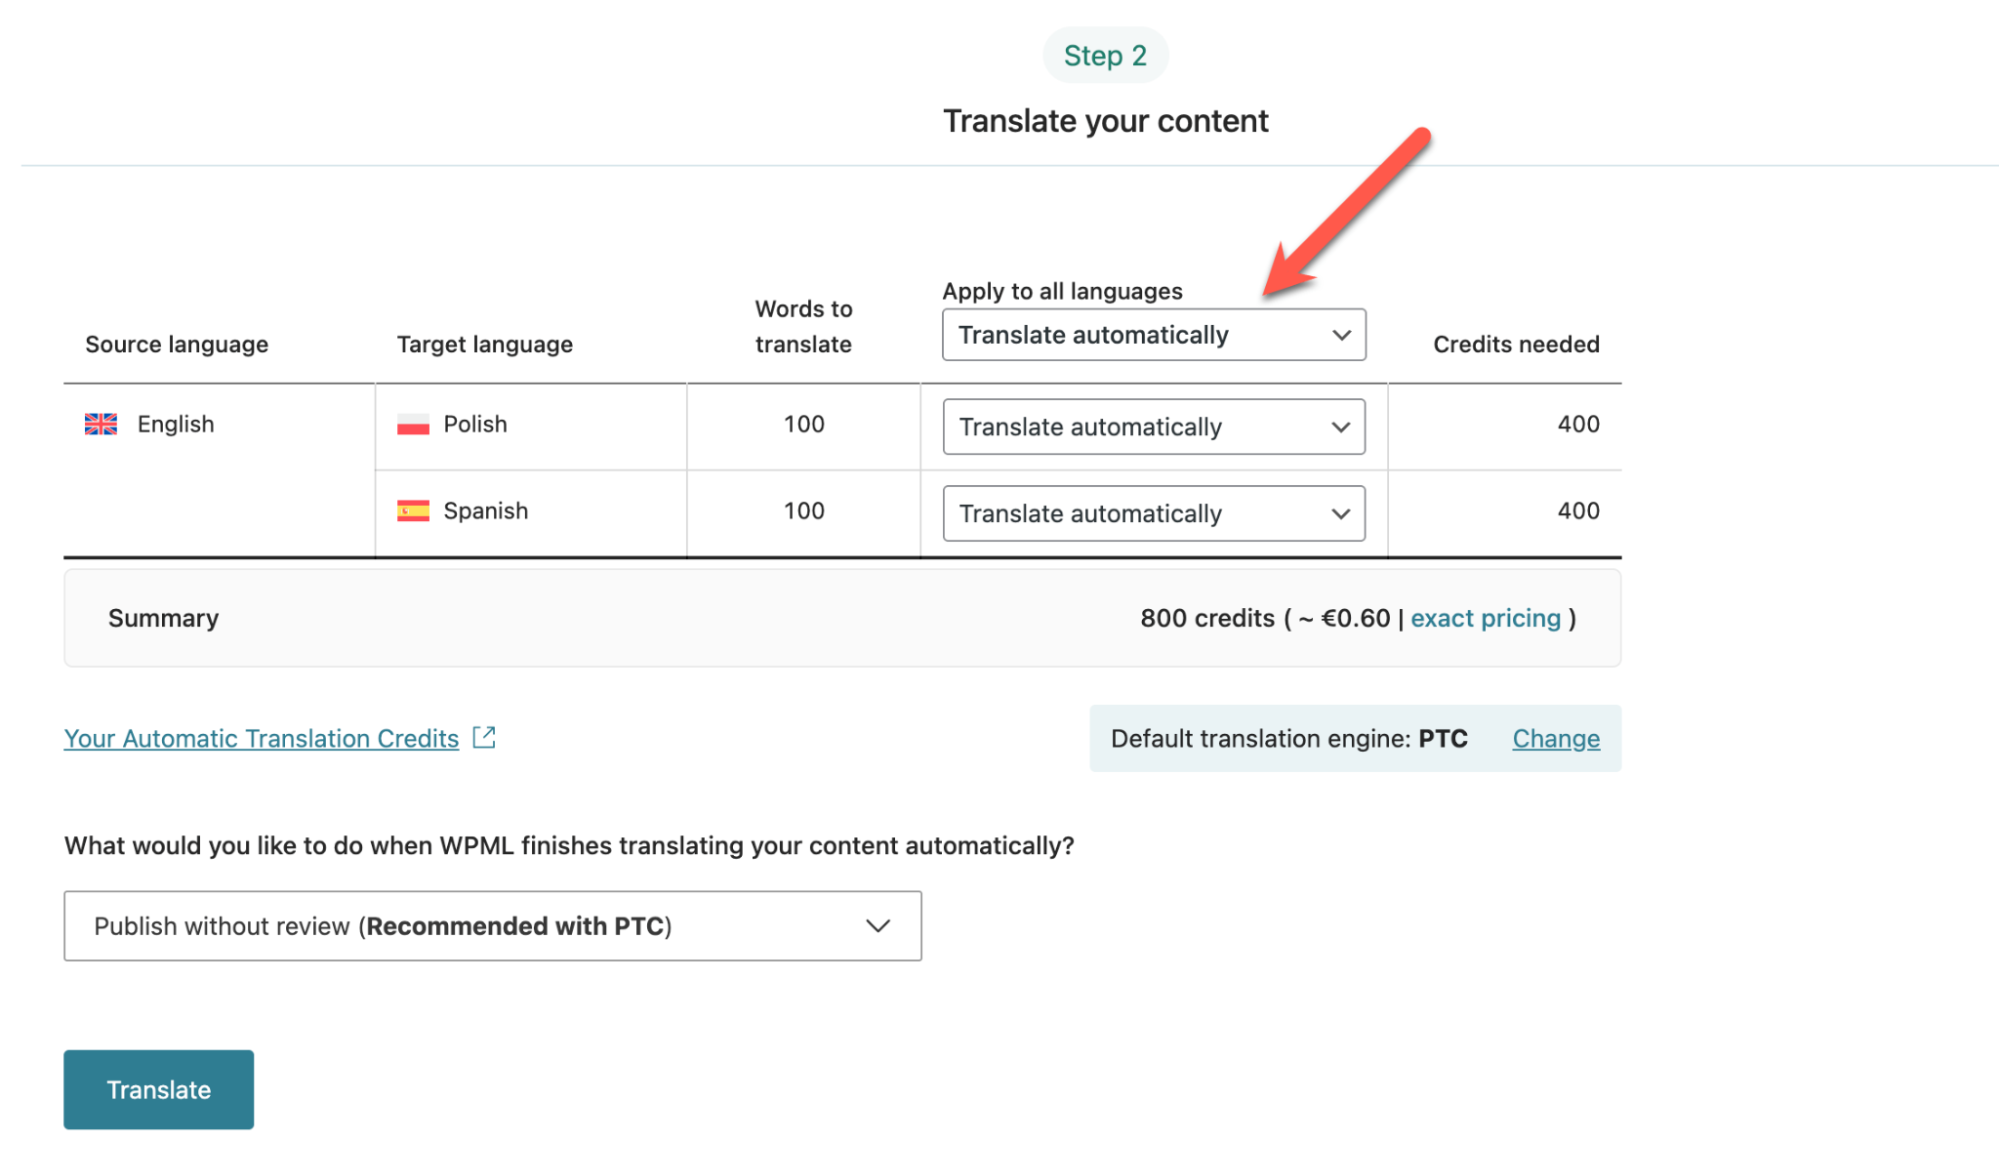
Then, click Translate.
After WPML finishes translating your content, you’ll see your content translated on your website when switching languages.
To edit your AI translations, visit the translated page on the front-end. If you see anything you want to change, click on Edit translations in your admin bar.
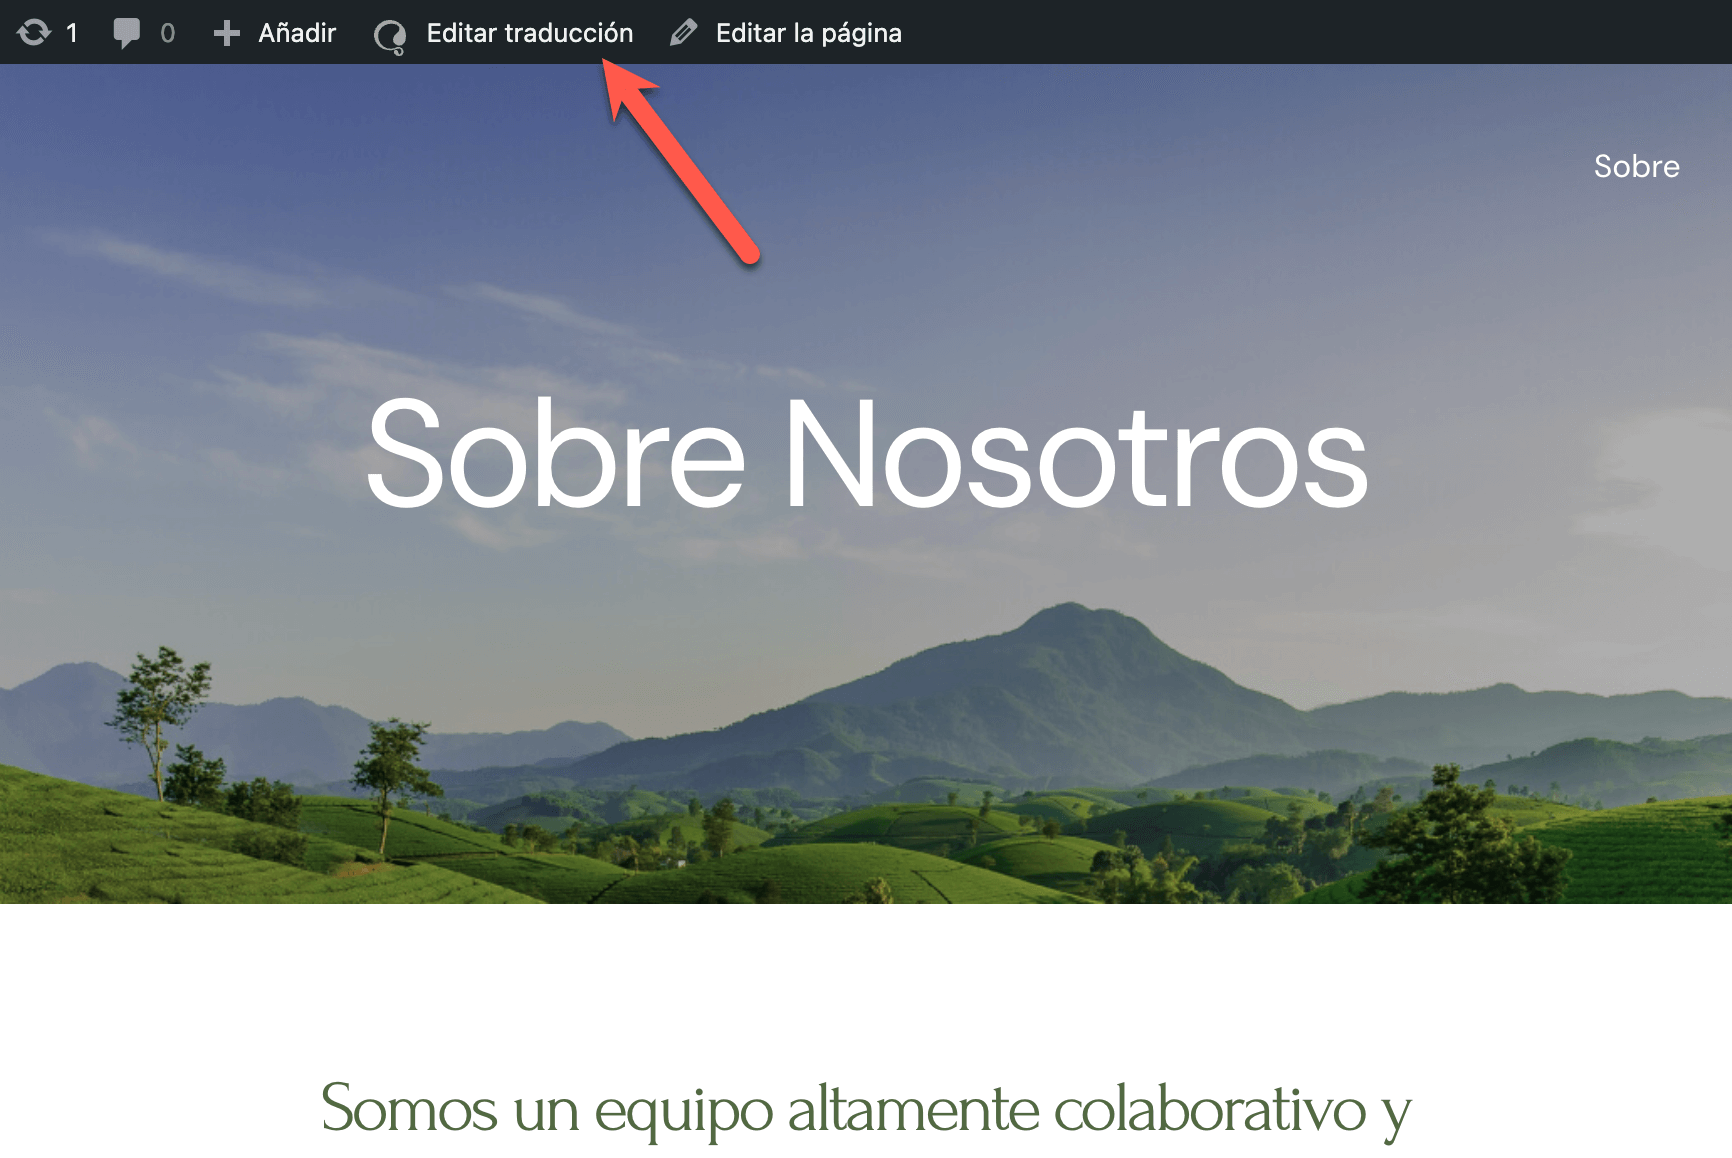
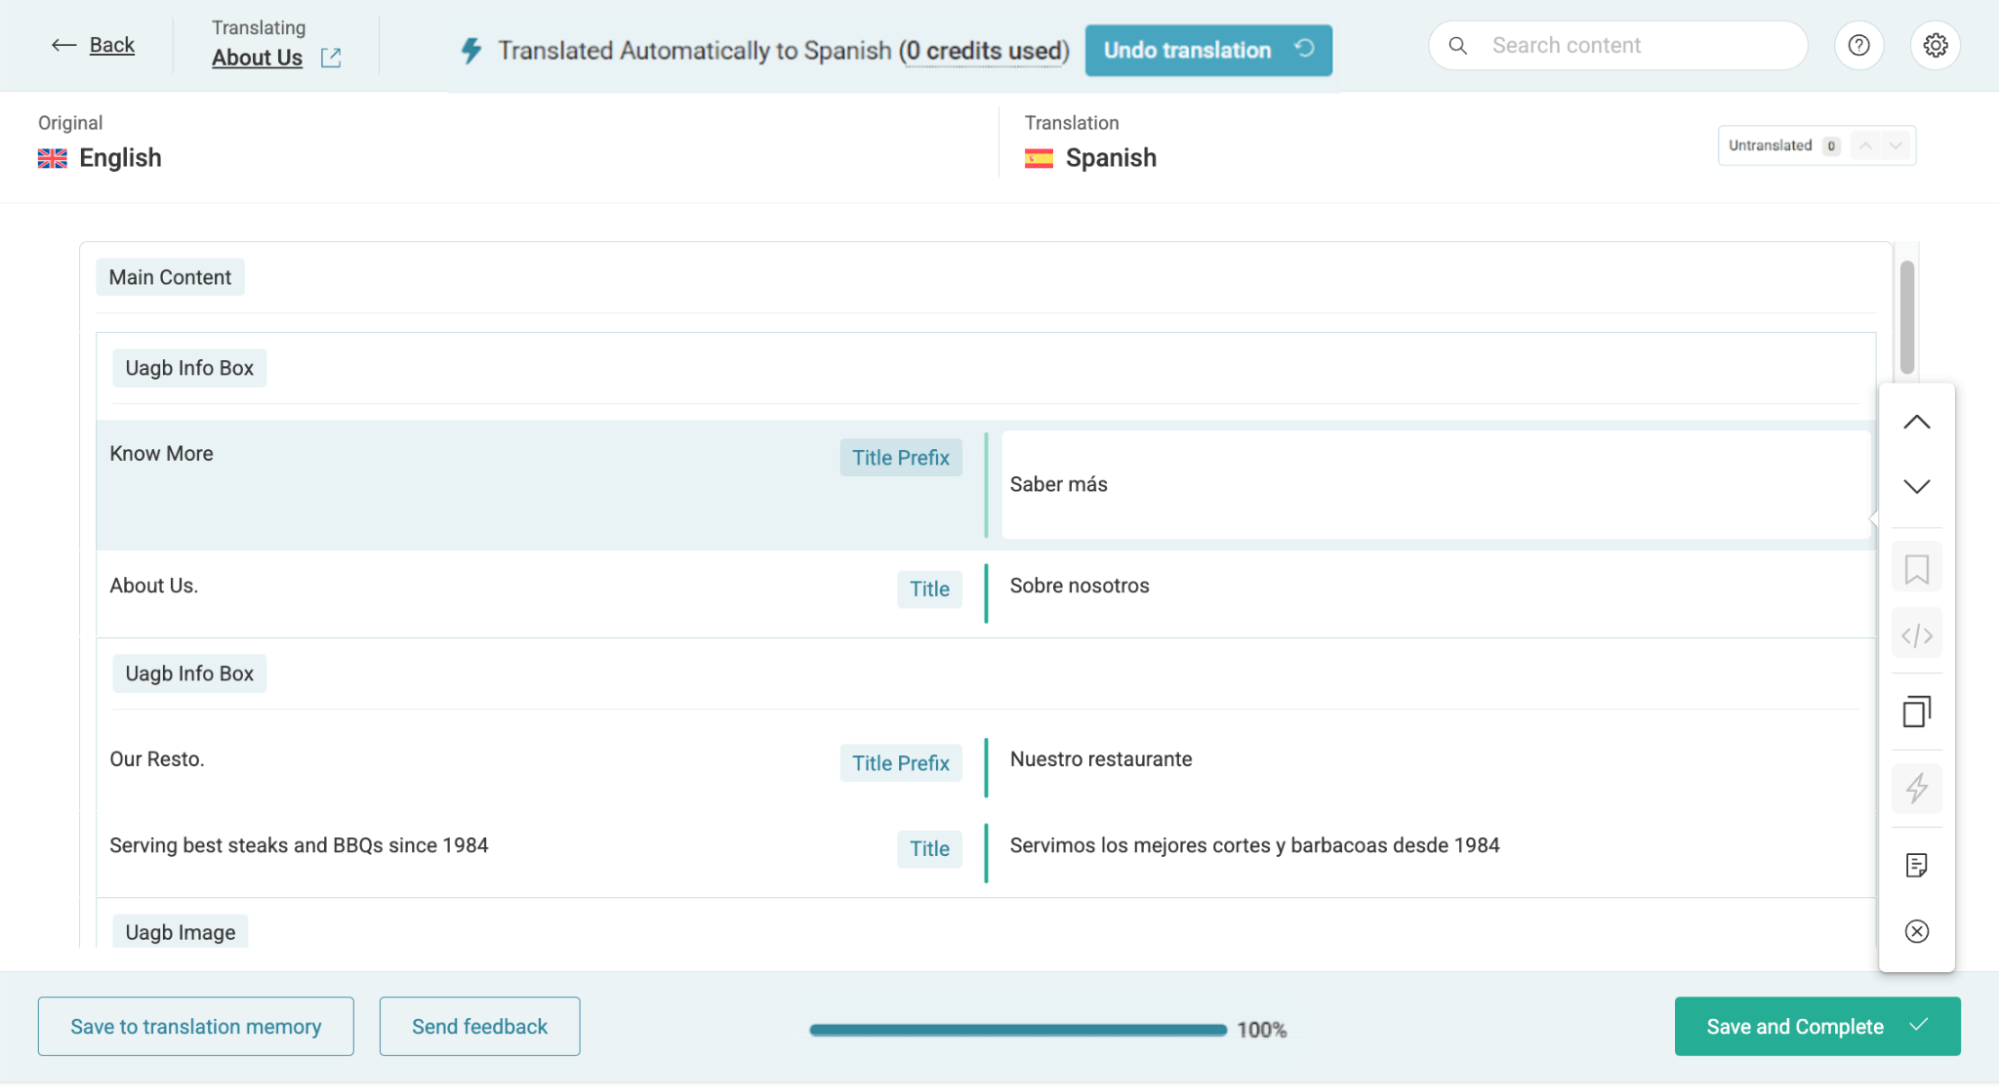
This will open the Advanced Translation Editor, where you can update the translations.
Translating Texts in Your Theme
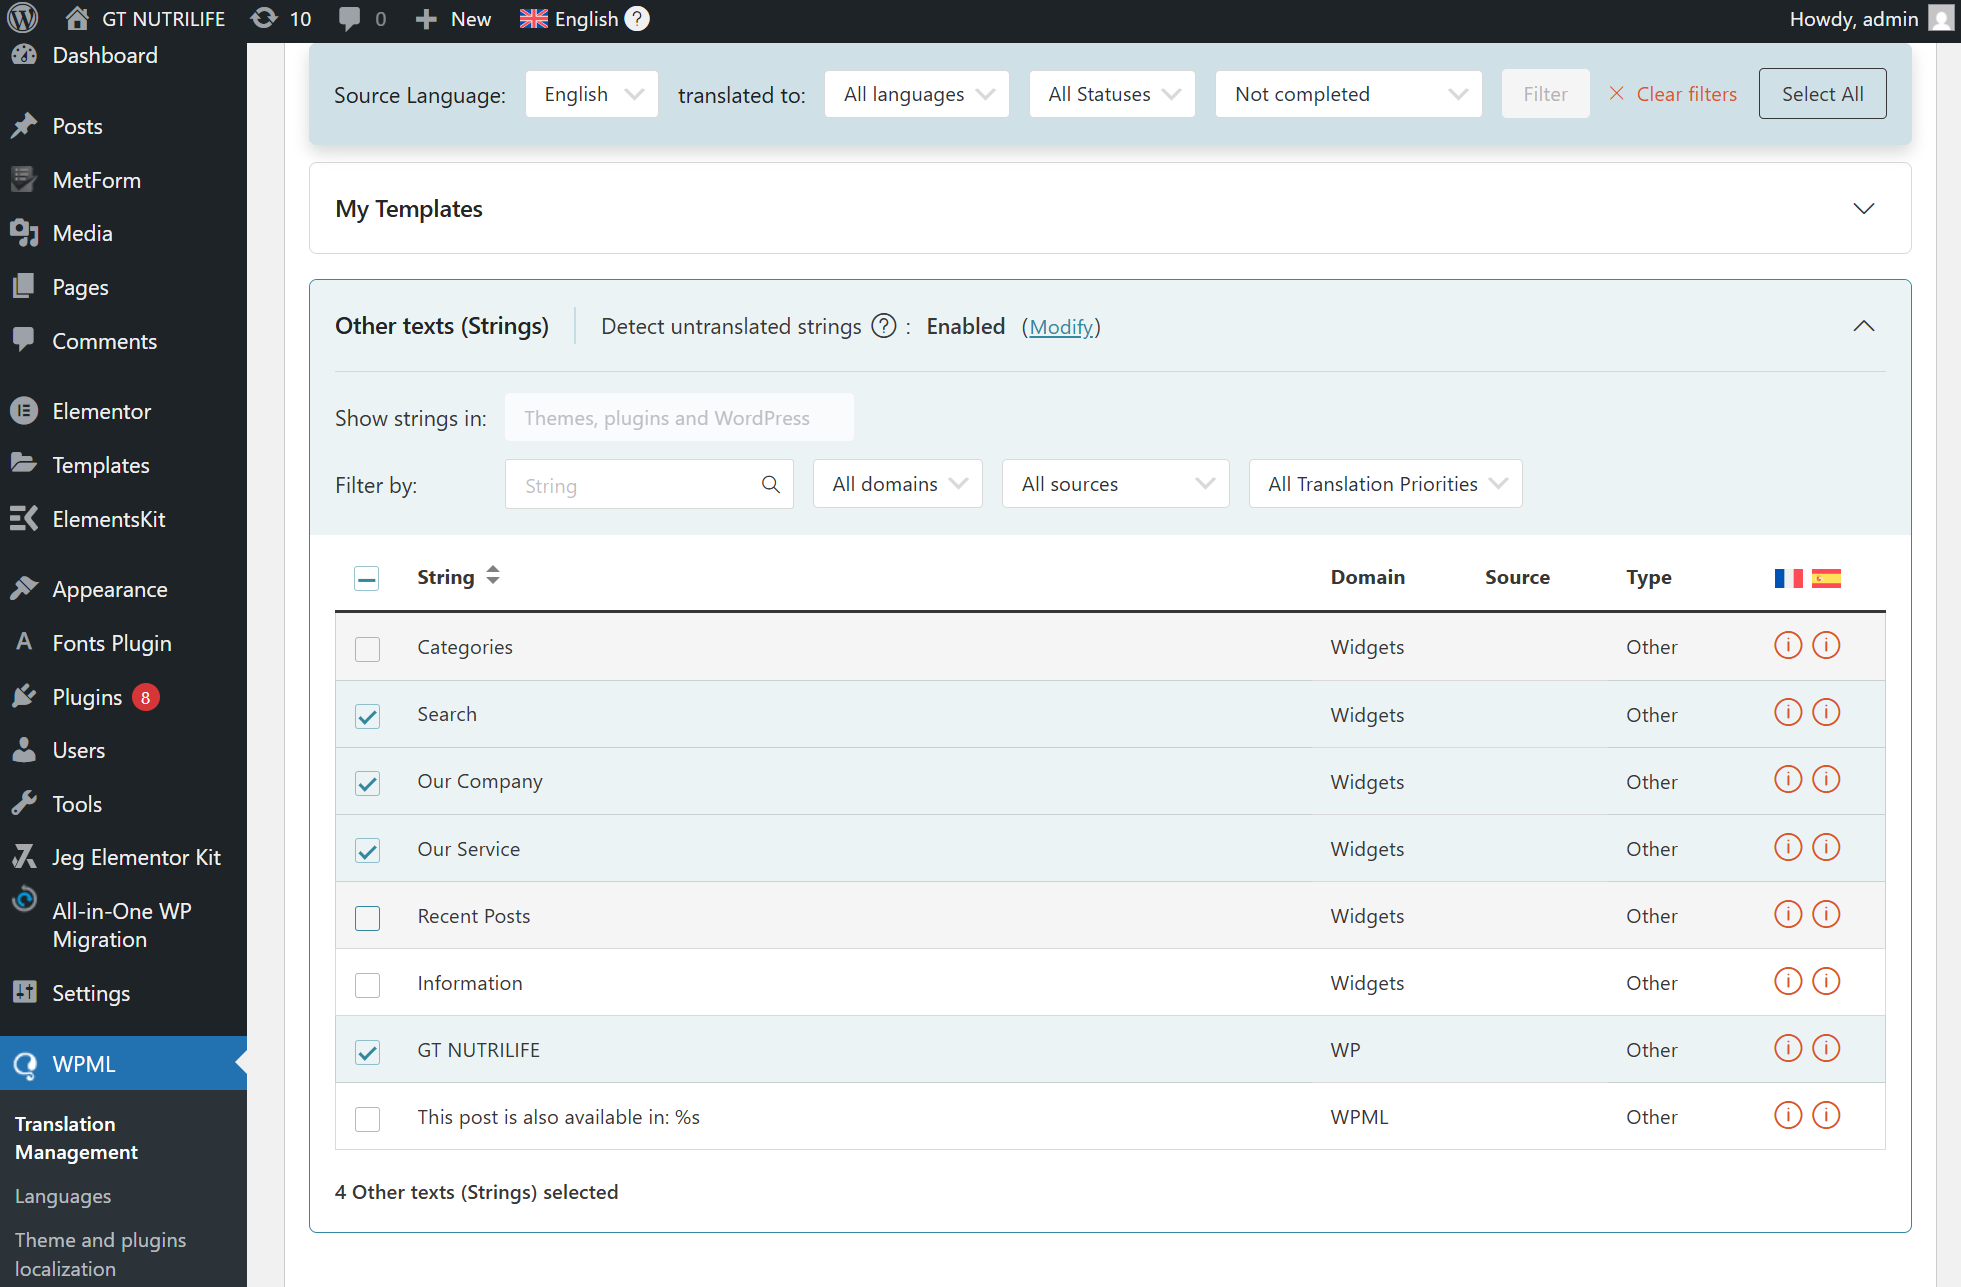
To translate texts coming from your theme, like header and footer, go to WPML → Translation Dashboard and scroll down to the Other texts (Strings) section. Search for the texts you want to translate, select them, and send for translation.
To learn more about translating strings, see WPML’s String Translation guide.
Translating Menus
To translate menus, check out WPML’s official menu translation guide.
Translating the Custom Post Types
WPML allows three modes for translatable content:
Translatable, only show translated items
Translatable, use translation if available or fallback to default language
Not translatable
This gives you great flexibility in deciding what content gets translated and how the translations are displayed (or not).
Navigate to WPML → Settings and scroll down to the Post Types Translation. Select one of two Translatable options in the row(s) for the custom post types you want to be translatable and then Save.
Translating the Post Body
WPML lets users translate content with ease. The post-edit screens include WPML’s translation controls, allowing to create new translations and edit existing ones.
You don’t need to do anything in the theme or plugin to make this happen. Translating content is a core feature of WPML.
What you do need to check is that any text that your theme adds to the output is translatable. For example, the highlighted texts in this screenshot should be wrapped in gettext calls.
Translating the Footer
Just like many other themes, this one uses widgets to store the footer texts.
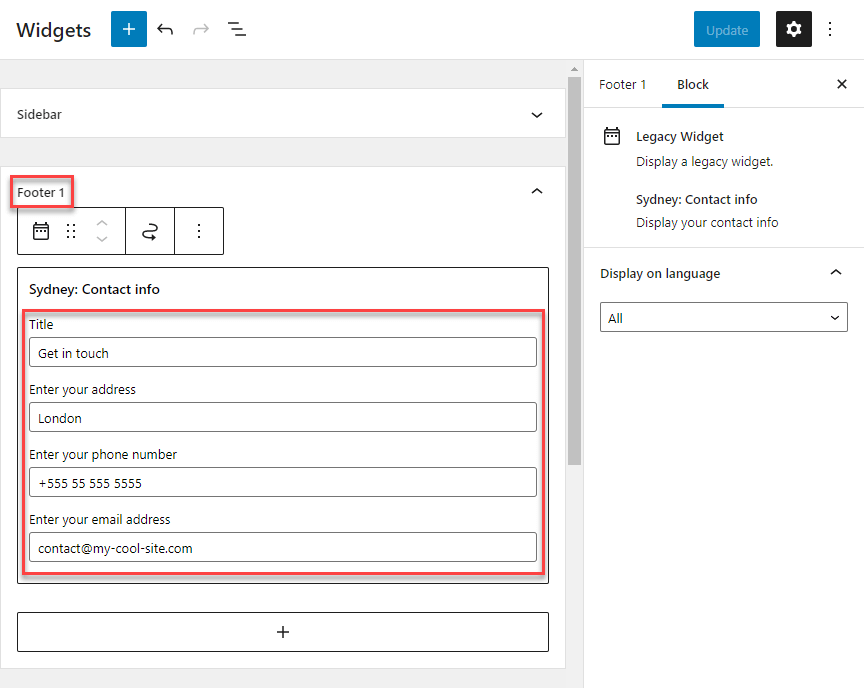
WPML allows users to translate the titles and content of your widgets via the String Translation screen.
Elementor Compatibility
Use Elementor with WPML and you can build any desired design and easily translate all your site’s content.
The Translate Everything Automatically mode automatically translates posts and pages built with Elementor.
Have a look at our guide on How to Build Multilingual Sites with Elementor and WPML or Translate Elementor Pages With WPML
Get your hands on the latest version of WPML with which you can easily translate all your WordPress pages in just a few clicks.
WooCommerce Compatibility
Themes that include a WooCommerce section may need to follow a few other suggestions. Mainly, you should use get_options to get the IDs of WooCommerce pages. Have a look at our guide on making WooCommerce themes multilingual and multi-currency-ready.
3CX Live Chat
We’re using 3CX Live Chat as FREE Live Chat for our product. This is strongly recommended for any business. You just set up and it’s ready to use. You can see 3CX FREE Live Chat WordPress plugin and features from WordPress.org
In order to activate your live chat you need to sign up with 3CX StartUP to get your web portal and apps to answer live chats.
- Get your free 3CX Account.
- Follow the steps in the wizard.
- Take note of the 3CX Talk URL that you will be given during the live chat step.
- Read our Getting Started Guide.
You also can watch this video to know more
Contact Form
Two best plugin for Contact Form, it’s WPForms and Contact Form 7 plugins.
WPForms
WPForms allows you to create beautiful contact forms, feedback form, subscription forms, payment forms, and other types of forms for your site in minutes, not hours!
The WPForms Challenge guides you through creating your first form in under 5 minutes. We walk you through using the form builder all the way to adding a form to a page on your site! WPForms includes integrations for popular page builders like the WordPress Block Editor (Gutenberg), Classic Editor, Elementor, and Divi making the whole process seamless.
Contact Form 7
Contact Form 7 can manage multiple contact forms, plus you can customize the form and the mail contents flexibly with simple markup. The form supports Ajax-powered submitting, CAPTCHA, Akismet spam filtering and so on.
Remove Footer/Copyright
Copyright on the footer which we defined for the theme, you can remove it by navigating to Appearance > Widgets > Copyright > click delete or edit Custom HTML.
3CX Live Chat
We’re using 3CX Live Chat as FREE Live Chat for our product. This is strongly recommended for any business. You just set up and it’s ready to use, download 3CX FREE Live Chat via Joomla! extension directory.
In order to activate your live chat you need to sign up with 3CX StartUP to get your web portal and apps to answer live chats.
- Get your free 3CX Account.
- Follow the steps in the wizard.
- Take note of the 3CX Talk URL that you will be given during the live chat step.
- Read our Getting Started Guide.
Remove / Replace Copyright
If you’re using Free version, copyright on footer will be shown. You can’t remove it, it’s copyright information for a template that you must to keep in order to use a template as Free license with us.
If you want to remove this copyright or replace with new content, please go with PRO version. Visit all Joomla! templates, find your template name and purchase PRO version.
Third-party Build-in Document
Template Framework
CSS Libraries
CMS Using
Support system
Ticket System
Dedicated Ticket Support System
Install Service
If you want to install the Quickstart package on your hosting, you can order here.
Extra Services
Customization Task
If you want to hire our developer for a custom template, you can request here.
Development Service
Looking for a new template for your project, and only use it for your website, ask our developer here.